 EN
EN
 Русский
Introduction
Nmap (Network Mapper) is one of the most powerful and popular tools for network scanning and security auditing. It is used both by cybersecurity professionals and system administrators to analyze networks, find open ports, identify active hosts, and detect potential vulnerabilities. But what makes Nmap so indispensable? The answer is simple: its flexibility, accuracy, and wide range of capabilities.
Port scanning is the process of checking the status of ports on a device or network. Ports are the “entry points” for data, and their state (open, closed, filtered) can reveal a lot about the system’s security. For example, an open port may indicate a running service that might be vulnerable to attacks.
The purpose of this article is to provide you with a complete guide on using Nmap to scan all ports and analyze the results. We will cover installation, basic and advanced commands, as well as practical examples. By the end of this article, you will be able to confidently use Nmap for your tasks.
What Is Nmap and Why Is It Needed

Nmap was created by Gordon Lyon (Fyodor) in 1997 and has since become the standard for network scanning. This tool is used for:
- Port scanning: determining which ports are open, closed, or filtered.
- Host discovery: finding active devices on the network.
- Service detection: identifying the services running on open ports and their versions.
- Vulnerability analysis: using NSE (Nmap Scripting Engine) scripts to search for vulnerabilities.
Nmap is applied in various scenarios:
- Network audit: checking network configuration and firewalls.
- Penetration testing: searching for vulnerabilities in network devices.
- Network monitoring: performing regular scans to detect changes.
Installing Nmap
Nmap is supported on most operating systems. Let’s look at installation on Windows, macOS, and Linux.
Installation on Windows
1. Go to the official Nmap website and download the installer.
2. Run the installer and follow the instructions.
3. After installation, open the command prompt and type:
nmap --versionIf you see the Nmap version, the installation was successful.
Installation on macOS
Use Homebrew to install:
brew install nmapInstallation on Linux
For Debian/Ubuntu:
sudo apt install nmapFor CentOS/RHEL:
sudo yum install nmapNmap Basics
Nmap has a simple command syntax. The basic structure of a command is:
nmap [options] [target]An example of a simple scan:
nmap 192.168.1.1This command scans the 1,000 most popular ports on the device with the IP address 192.168.1.1.
Types of Scanning
- TCP scan (-sT): scans TCP ports by establishing a full connection.
- SYN scan (-sS): a faster and stealthier method that does not complete the connection.
- UDP scan (-sU): for scanning UDP ports, which are often used for DNS, DHCP, and other services.
Scanning All Ports
To scan all ports (from 1 to 65535), use the command:
nmap -p- 192.168.1.1The -p- option tells Nmap to scan all ports. To speed up the process, you can add the -T4 option:
nmap -p- -T4 192.168.1.1This will increase the scanning speed, but may reduce accuracy.
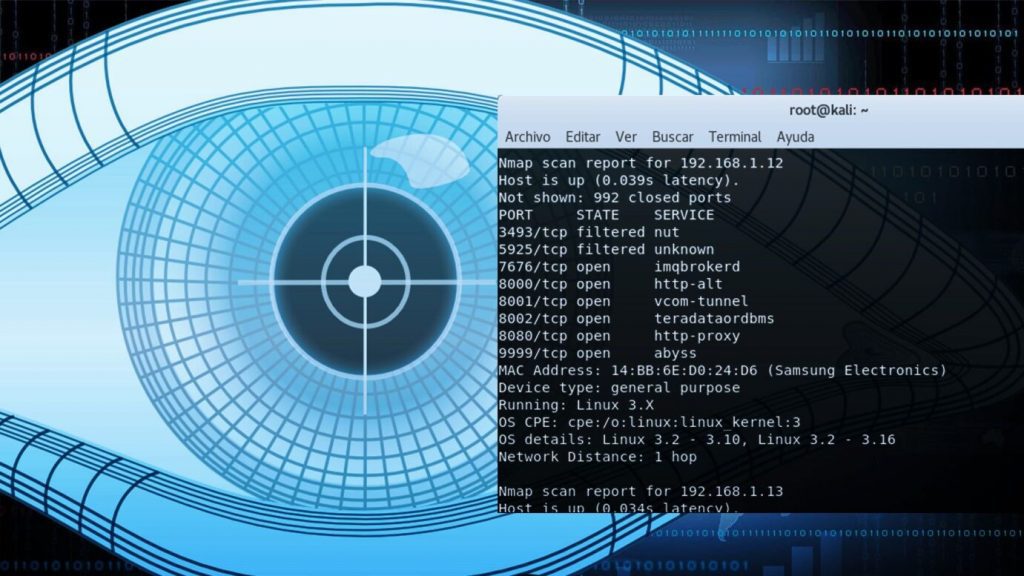
Analyzing Scan Results
After the scan is complete, Nmap outputs a report. For example:
PORT     STATE SERVICE
22/tcp   open  ssh
80/tcp   open  http
443/tcp  open  https
Here:
- PORT: the port number and protocol.
- STATE: the port state (open, closed, filtered).
- SERVICE: the service running on the port.
For more details, use the options -sV (to detect service versions) and -O (to detect the operating system):
nmap -sV -O 192.168.1.1Advanced Scanning Techniques
Nmap supports NSE (Nmap Scripting Engine) scripts that extend its functionality. For example, to search for vulnerabilities, use:
nmap --script vuln 192.168.1.1To bypass firewalls, you can use packet fragmentation:
nmap -f 192.168.1.1Safety and Ethics of Using Nmap
Using Nmap without the network owner’s permission may be illegal. Always obtain permission before scanning. As the renowned security expert Bruce Schneier said:
“Security is a process, not a product.”
Tools for Visualizing Results
Zenmap is the graphical interface for Nmap. It allows you to visualize scan results and save them in files (XML, CSV). Download Zenmap from the official website.
Practical Examples and Use Cases
Example 1: Scanning a Home Network
nmap 192.168.1.0/24This command scans all devices on the 192.168.1.0/24 network.
Example 2: Scanning a Web Server
nmap -p 80,443 example.comCommon Errors and Optimization Tips
- Do not use too high a scanning speed (e.g.,
-T5), as this may lead to false results. - Ensure you have administrator privileges when scanning.
Conclusions
We have explored how to use Nmap to scan all ports and analyze the results. You learned how to install Nmap, execute both basic and advanced commands, and interpret the output. Regular network scanning helps maintain security and prevent threats.
FAQ
How Do I Choose the Right Scanning Options?
Start with basic commands such as nmap [target] and gradually add options like -sV or -O.
What Should I Do If the Scan Takes Too Long?
Use the -T4 option to speed up the scan, but keep in mind that it might reduce accuracy.
Additional Resources
- Official Nmap Documentation.
- The book “Nmap Network Scanning” by Fyodor.
Try ScaniteX for Free!
Automated platform for scanning open ports and detecting active services online.
Start a 24-hour trial period (promo code FREE10) to test all scanning features for your business security.
Get Free Trial


Leave a Comment